PLEASE NOTE: I've moved! Feel free to continue following me via my new blog Embrace Serendipity.

**All tutorials & the majority of the posts from this blog have been moved over to my new blog**


Mar 30, 2011

New York Layout


Hello again fellow scrappers! Today's page is one that I've been meaning to scrap for ages--yeah--none of us knows what that's like right? :-) When I saw sketch #149 over at Creative Scrappers; that light bulb just went off! It was perfect to showcase this trip my husband & I took back in 2006 to NYC. He had never been to the top of the Empire State building--meanwhile I had been there about 20 times--so I was the one to take him for the very first time. The picture is us at the very top of the Empire--you can see New York behind us. Gorgeous view! I absolutely LOVE the city--all the small pics you see were all taken by me during different trips into the city or from New Jersey.


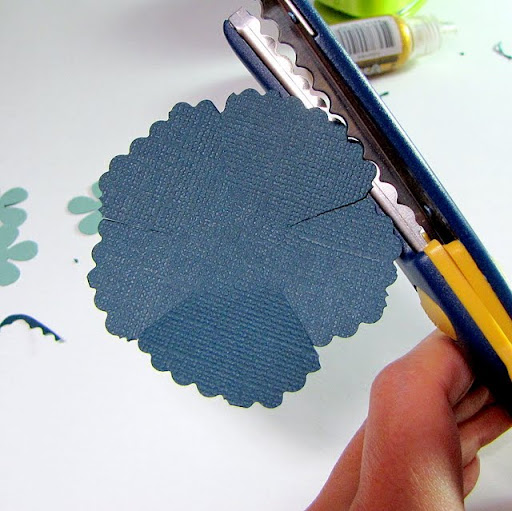
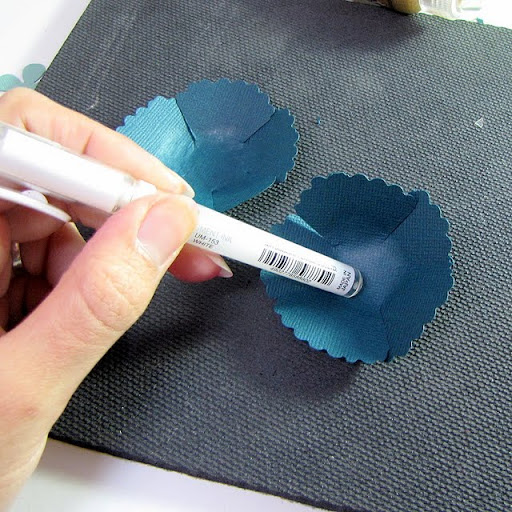
Once again I did a lot of stamping. The script you see in the background is part of the paper but everything else was stamped. I take much of my stamping inspiration from Irene also known as Scrapperlicious. I love her stamping--to me she creates works of art with her stamping. I did some stitching & misting. I also finally got to use those fragments by Tim Holtz that I've had in my stash forever. I thought they would showcase my NYC pictures really well.


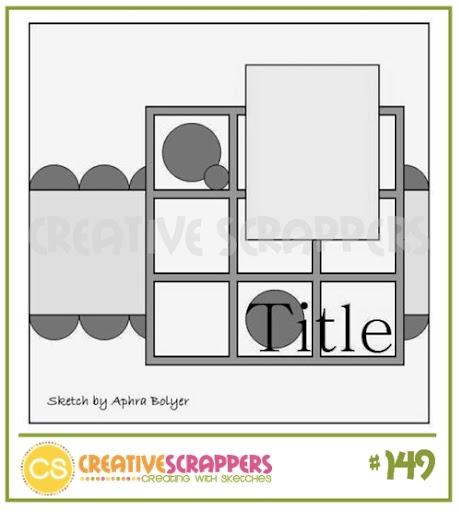
This is the Creative Scrappers sketch I based this page on.


This flourish is actually not chipboard--it's made out of wood. I found this small company over in France called Scrap Désirs that sells all sorts of very cute wooden embellishments! I found them to be very unique. For this flourish I simply covered it in three colors of fine glitter--dark brown, light & dark turquoise.


A close-up of the large transparent flower. This is actually a different take on the glass flowers I displayed here in my blog not too long ago. If interested in making this flower please go here. The only difference is that I alcohol inked the flower in Butterscotch & a touch of Bronze & then stamped on it with a script stamp with black StazOn ink. Whenever stamping on transparencies--always use permanent ink such as StazOn. Any other ink will smear.


A close up of the Tim Holtz fragments. I also stamped on some of the fragments. The stitched dark brown frame was made with a Martha Stewart punch around the page titled Cherish. This punch begs to be stitched. It takes two seconds before eternity to do--but it's worth it for the effect. I thank my scrap buddy Natasha for being a stitching fanatic! She always stitches around the border whenever she uses this punch & it's so very much worth it!


Finally, a closeup of the stamped city & title. This city stamp is by Stampers Anonymous Tim Holtz collection titled Cityscape. I used a combination of Stampers Anonymous stamps (mainly from the Tim Holtz collection) & Stamp Enjoy.


Thanks to all of you who take the time to stop by my blog. I appreciate your visit so very much!


Till my next post...

Mar 22, 2011

Brothers Layout


Good evening fellow scrappers & bloggers! Today I bring you a page titled 'Brothers'. This is my husband (far left) along with his two older brothers. Yep, he's the baby--in more ways than one! Shhhh, don't tell him I said that!

This was taken on Thanksgiving 2010. This was truly a monumental event! These three haven't been under the same roof since when they were teenagers...the very next day we got about 24" inches of snow (no kidding) so that's how miraculous it was to have these three together again! Them being together even seemed to disrupt Mother Nature. They all live in different states--which is why it's hard to get them together.

Needless to say my in-laws were ecstatic to have the three brothers together again & I went photo crazy. Luckily they posed for me for not just one but several pictures--this one being my favorite. I plan on giving this page framed to my mother-in-law. I think she deserves it! :-)

This is a very 'manly' page. It had to be! My brothers-in-law would drop kick me if I made anything dainty with thier pictures in it. So I went all out with the grunge look!

I used papers from the February "Things Remembered" Swirlydoos kit & did a whole lot of stamping, masking & inking. I've come to the conclusion that I'm a stamper. I LOVED making my own background on this page & have been stamping on my pages more & more. So I think I finally found my calling. :-)

I also did this page for Creative Scrappers. I based this page on thier Sketch #146. Here's the sketch:

Besides stamping the background I also stamped on the burlap. You can see a little bit of it here in this picture. I did the woven stitch around my title. For a tut on this woven stitch, please go here.

The quote I found on the internet & found it to be just right for this page. It reads: "A brother shares childhood memories and grown-up dreams"

A closeup of some of the stamping, misting & masking I did for my background.

I'm starting to upload small 'stamping tips' here on my blog. For a quick tip on how to make your own shaped stamped collages like this one, feel free to go here.

I also have a tip on how to get that streaked, distressed look you see on my background page--please refer here for that quick tip.

I used a Tim Holtz mask for the clock. I then did a zig-zag stitch all around the border of the clock.

I cut out a circle that was larger than the clock & used that circle as a mask for the inked orange circle going around the clock.
This page wouldn't be complete without a 'man flower'...so here's my version of it. I made this flower from burlap. For a tutorial on how this flower was made--please feel free to go here.

The other two smaller burlap flowers are by Prima. They were white burlap--I misted them with Tuscan Sun glimmer mist.

The brick chipboard is from Dusty Attic. I inked it with Vintage Photo distress ink, then heat embossed it with Vintage Photo embossing powder. I removed some of the bricks out from the 'wall' & adhered them with pop dots in order to make them stand out from the rest of the bricks. For the bricks that are standing out, I then spread some Walnut Ink distress stickles on them.

I hope I did my brothers-in-law justice & made for them a very 'manly' page.

Thanks to all who stop by--I truly appreciate your visit.

Till my next post...

Burlap Flower Tutorial


Good evening fellow bloggers! Today I bring you a tutorial on how to make burlap flowers for those 'man' pages.

Having primarily men to scrap--I'm constantly trying to come up with masculine flowers for my pages. A hard task since obviously most flowers are geared towards feminine pages. For a while I had this idea of making a burlap flower. However, I wanted it to have dimension--I didn't want it to be flat. It finally dawned on me how I could achieve this look. I modeled these flowers after the Grunge Flowers that Tim Holtz made so very popular. In fact, to get a more detailed step-by-step tut on how to make this kind of flower in general, please refer to his tutorial here.

You can find these burlap flowers in full action on my page titled 'Brothers'.

Here are your basic list of supplies: Big Shot or any other compatible die cut machine, flower die (I used Sizzix Original Die - Flower Layers #5 in my example) although you can use any flower die as long as it has petals, burlap, white puffy paint, distress ink, pencil or thin paint brush for rolling/shaping petals & a heat gun.

So let's get started!

Step 1: This is the main trick in making this type of flower. Take your burlap & glue it onto a piece of cardstock/paper. This makes for another great way to use up those scraps! Try to glue the burlap to scraps that have around the same tone of color as the burlap--in other words anything in the brown/tan family as shown here. Let the glue dry for a few minutes. If you run this through your die cut machine right away, you'll get glue on your die.

Cut out three flowers.
As you can see in the top of this picture I had already made one flower. Since the burlap is adhered to the paper, it'll be sturdy enough for you to shape & in turn will give you a burlap flower with dimension.

Step 2: Now start going through the same steps used in Tim Holtz's Grunge Flower tutorial. I'll present them at a high level.

Snip your petals about 1/2 an inch to make it easier to curl your petals later.

Step 3: Cut the flowers as shown here. Starting from left to right: completely cut out one petal, completely cut out two petals and for the last flower snip one petal all the way to the center of the flower but leave all petals on the flower.

Step 4: This step is optional. I wanted to give my flower more color in order to make it stand out on my page. So I misted it with Suede Glimmer Mist. You can do the same if you want your flower to have more color to it.

Step 5: Here's my flower all misted.

Step 6: I wanted each layer of the flower to stand out. So I decided to highlight the edges of the petal with puffy paint. I like white because you can then ink the white to make it any color you need it to be. You can find puffy paint at any Michaels, AC Moore, Hobby Lobby etc--just about any craft store really. I found mine at Michaels.

Step 7: Here's my flower with the puffy paint added. Let the paint completely dry before proceeding. It takes about 4 hours for the paint to dry according to the instructions on the bottle--but it's worth the wait!

Step 8: Once the puffy paint is dry--you're going to heat it up with your heat tool. As the puffy paint heats up it'll well...puff! That's what gives this particular paint it's name. Do not hold the heat gun too close to the paint or you'll burn it. The paint will puff with the slightest amount of heat.

Step 9: This step is also optional. If you want to give your puffy paint some color...ink it up! White didn't really go with my page--so I inked it up a bit with some Spiced Marmalade distress ink.

Step 10: Glue your flower together by overlapping the petals. I use a hot glue gun to do this--you can use whatever glue you feel glues fast & good!

NOTE: If you're using a glue gun--I found out that you should curl the petals glued together right away instead of letting the glue fully cool off. I curled the petals after the glue completely dried & I had to turn into a gladiator to do so because the glue hardens the petal! You can still shape them--but it's just harder to do so.

Step 11: Curl your petals down by using a pencil or the handle of a thin paint brush.

Step 12: Here I am shaping the center of the flower. The center of the flower consists of the two petals cut out from one of the flowers. I curled one petal down, overlapped them & then curled the other petal in as shown here.

Step 13: What you put in the center of your flower is up to you. You can either put all the petals you cut out from your flowers or you can put stamens like I did. I decided to go with stamens that I had in my stash. If you ever want to insert stamens into the center of a flower--use a wire as shown here. Loop your wire through the middle of your stamens--then run the wire through the center of the flower & pull your stamens through.

Step 14: Layer your flower by off-setting each layer & you're done! Here's my finished flower. NOTE: as you work you may rub off some of the distress ink from the puffy paint. If so, simply ink up your flower at the end again.

As mentioned before...to see a more detailed step-by-step tut on making this flower in general--refer to Tim Holtz's Grunge flowers here.
The neat part about this is that this will work with any type of fabric. So if you have pretty fabric that you want to make flowers from but don't want flat flowers--simply adhere the fabric to a piece of cardsdtock & you're good to go.

Hope you all enjoyed this tutorial & thank you so much for stopping by!

Till my next post...

Swipe Technique For Distressed Background

Here's another quick stamping tip. Want to get a streaked, distressed look on your page?

Simply take a distress ink pad & just swipe it down your page from top to bottom.

NOTE: Only swipe from top to bottom--not up & down.

Keep swiping from top to bottom until you get the distressed 'streaky' look you desire!

If you're nervous about trying this out on your project--practice on some scrap paper first...after all, practice makes perfect...

Have fun!

Using Masks for Stamping


Time for a quick stamping tip...if you want to get a collage of stamped images shaped into a particular shape--try paper masks!

This circle collage you can find on my 'Brothers' page.

Here's how I went about creating this circular stamped collage.

With any circle cutter, cut out a circle in the size you need it out of sturdy cardstock as shown here. Keep both the positive & negative cut outs...because you'll be using both.

With the negative piece place it over the area you wish to stamp. Then start stamping. NOTE: Clear stamps work best for these kinds of projects since you can see where you are stamping.

Make sure that wherever you stamp part of the stamp is on your page & part of the stamp is on the mask as show in the picture here. For areas where the stamp goes past the mask--just tuck another piece of scrap paper beneath it in order to protect your project from unwanted stamping.

Make sure you keep your mask in place. If you can't seem to keep your mask in place--just use small pieces of masking tape to help you keep your mask still until you're fully done stamping.

Here's my finished stamped circle collage. As you can see, I combined several stamps into one & even changed up the ink color I used. If you take a look at my mask, you'll see remnants of my stamping.

Finally, to accentuate your circle--take your positive circle cut & place it over your stamped collage. Then either trace around the circle with a colored pen or take your ink tool & start inking around the circle.

For my circle collage I chose to ink around the circle with Spiced Marmalade distress ink.

Us this tip to make stamped collages out of circles, squares, hearts etc...

Hope this helps some of you try out some stamping today on your projects!

Till my next post...

Mar 16, 2011

Paper Flower Tutorial


Good evening fellow scrappers! Today I bring to you a brief & simple tutorial on how to make your own paper flowers. I based these flowers on some Prima ones that I bought at my local scrapbooking store. The packet of 5 flowers cost me $5.00. After staring at them for a few I wondered if I could somehow create my own flowers similar to the ones I bought. This is what I came up with. Mind you, they are not exactly like the Prima ones...after all, I'm not Prima--although I wouldn't mind being them! But I think they're a good replica & these are great for using up any left over scraps! I made these two flowers with left over scraps from my 'Love' page.

To make these flowers it's all about you shaping the petals as much as you can--you'll see what I mean when we go through the steps.

Alright, let's get started...
Here's your basic list of supplies: Decorative scissors (I used the Scallop decorative scissors by Fiskars), stickles, retro flower punch (small), either a pen or a paint brush in order to shape your flowers (not pictured) & a flower die. For my flowers I used Sizzix Flower Layers.

Step 1: Punch/cut out your flowers. I used 4 retro flowers & 3 sizzix flowers (2 large & 1 medium flower). NOTE: I know in my photo I only show 3 retro flower punches but after making the flower I added one more layer to make it 'fluffier'.

Step 2: With your scissors, cut about 3/4" of an inch towards the center of the flower for each petal. This is to make more defined petals for the flower.
Step 3: Take your decorative scissors & trim the edges of your flowers. You do not have to be perfect. In fact, the more imperfect the more realistic your flower will be.

Step 4: Take your pen or paint brush handles (as long as it's a round edge & not too thin) & start shaping your flowers. Just go in a circluar motion while pressing down--you'll start to see the petals of your flowers curl up. NOTE: I used the bottom of my mouse pad as the padding for shaping my flowers. Shape as much as you want--this is what will really give your flowers it's shape.

Step 5: With a thinner handle (I used a thinner paint brush) curl the edges of your petals down.

Step 6: To further shape your flowers pinch the very tips of each petal down with your fingers. Once again, shape, curl & pinch as much as you want. The more you shape the fluffier the flower!

Here are my 3 layers of flowers all pinched, curled & shaped.

Step 7: Layer your flowers. Off-set each layer. NOTE: I added a pop dot beneath my top layer only in order to give this flower more dimension.

Step 8: Now to shape the center flower. Take your thinner brush or pen/pencil & curl the petals up. Only curl 3 of the 4 flowers.

Step 9: Take the remaining retro flower & roll it together between your fingers until you have a small bud as shown in the picture.

Once your bud is shaped--glue it this way. I tend to open it slightly squeeze drops of glue all along the inside petals & then roll it back together again--the petals will stick together since when you roll the flower the inner petals overlap one another.

Excuse my inky pink fingers! Apparently I was inking something pink prior to making this tut. My hands are always inked in different colors it seems...

Step 10: Take one of the 3 curled retro flowers slightly pinch it close as shown in the picture. You will not pinch this one as tightly as the first one. This is only to shape it.

Step 11: Layer your inner flower & glue. Off-set each layer. NOTE: Don't these make cute little flowers just by themselves? Something to think about when you're trying to find that small little flower to fill that one spot on your project!

Step 12: Glue the center flower inside the bigger one & ta-da! You're done.

Step 13: Optional step...take your stickles & add some glitter randomly along the edges of some of your petals.

Here's my flower & the lighter turquoise one next to it is the Prima one. So what do you think? Was my attempt any good?! :-)

I kept shaping & fluffing my flower after the Stickles dried. Remember, the more you shape & pinch together the more dimension your flower will have.

Hope you found this tutorial helpful & thank you to all who stop by!

Till my next post...